
| Home | Projects | The Shop | Contacts and Links | Guest Page | Family Stuff |
|---|
| Projects The Workshop
2/18/06 update 5/14/06, 5/22/06, 8/29/06, 9/12/07see
below Well the bug set in ... needed more space. The garage served well but just not enough room and no way to expand. Anytime I wanted to work on any project I had to move the cars and other things just to get to the machines. This was about a year ago, since then it has only gotten worse. So ... where to put a workshop, how big and the cost were the big questions. After much planning, the location became obvious. The size ... as big as possible of course! And the cost ... well that almost stopped the project. There had to be a lower cost method and after a few months of looking we found it. A company call Tuff Shed with a local office a few miles down the road. This is not a shed (although they do have them) it is a full up 24x16' garage with 2x4 studs on 16" centers, rafters at 24" centers, a man door and a 7' wide garage door. Full engineering plans approved and inspected by the city. How much? With a concrete slab that also meets city requirements ... 1/3 the cost of a contractor to do the same job. I would do all the electrical, insulation, drywall and inside/outside painting ... more savings! Now the time line ... hold on to your hat as now things really begin to move. After deciding the final size and door locations it took Tuff Shed 2 weeks for the plans, the city took 3 days to approve. A few days later the cement contractor started and took 4 days to remove an existing slab and spa, dig footing, lay rebar and pour cement. He started on Monday finished on Friday with a day for footing inspection and he is done. Tuff Shed started the next Wednesday and finished (all they could) a day and half later. Another inspection, we painted, they came back a few days later to finish the roof and they are done. A new workshop build in 3 weeks! But wait ... it's my turn. Now things really begin to slow down. Here's what I have done to date and need to do before move in: Pull a 240v (3 wire 6awg) 60 amp line from main power panel to a sub-panel in the workshop. DONE. Gets some lights in the place ... see what I'm doing. DONE. Pull from the sub-panel lines for outlets, lights and 240 at various locations around the shop. In process should finish in about another week. Install insulation in ceiling and walls. Take a few days. Drywall a week or so. Paint 2-3 days. So move in day ... maybe early March! Of course this will delay my A3 project but it's well worth it! The following pictures show some of the details: |
| Here is the future home of my new workshop ... it has to be 3' from the property line, 6' from the existing house and about 8' from the back property line. We didn't want to remove the orange trees, peach tree or the tangerine tree so this left us with a 24x16' workshop. Should be big enough! |
|
 |
 |
|
| There goes the Spa, someone wanted it,
but it fell apart due to termites. It was 15 years old and we had fun
with it ... oh well, time marches on. |
Will it fit?? We lost a few oranges, but they will grow back. |
|
 |
 |
|
| It did ... but it's easier to haul in quarters. | Back to the demolition ... it took about
hour to break it up and haul away! |
|
 |
 |
|
| Digging the footing and setting the forms. | Everything set and ready to pour. |
|
 |
 |
|
| Done ... waiting to dry over the
weekend! |
Walls are here ready to install. |
|
 |
 |
|
| Installing walls, roof is next. Man is this fast! | Done and bought off by the city. I do
have a little paint touch-up to do. And of course lots inside work to
do. |
Update 5/14/06 Well, it has been long time since my last update. I have been working on the workshop ... it has just been a slow project. I only work on it a few days a week, then only for 3 - 4 hours at a time. But progress has been made ... the following photos shows the details. |
 |
 |
|
| This view is looking as you walk into the shop. Patrick and Mckenna have already taken up a play spot! I had better get going or they may take over! | This view is from the
big door opening looking at the main entrance. Some power has been wired
in ... the right wall is where a workbench is going you can see where
the 120 power has been installed. |
|
 |
 |
|
| Here is a close up of
the main entrance. The blue box is the outlet for the outside motion
detector lights. The switch, when turned off then back on, allows the
lights to come on and stay on, rather then just for 10 minutes or so.
The dual switches on the left are for the lights ... one for a single 2
bulb 8' section, the other switch is for the 3 other 2 bulb 8' sections. |
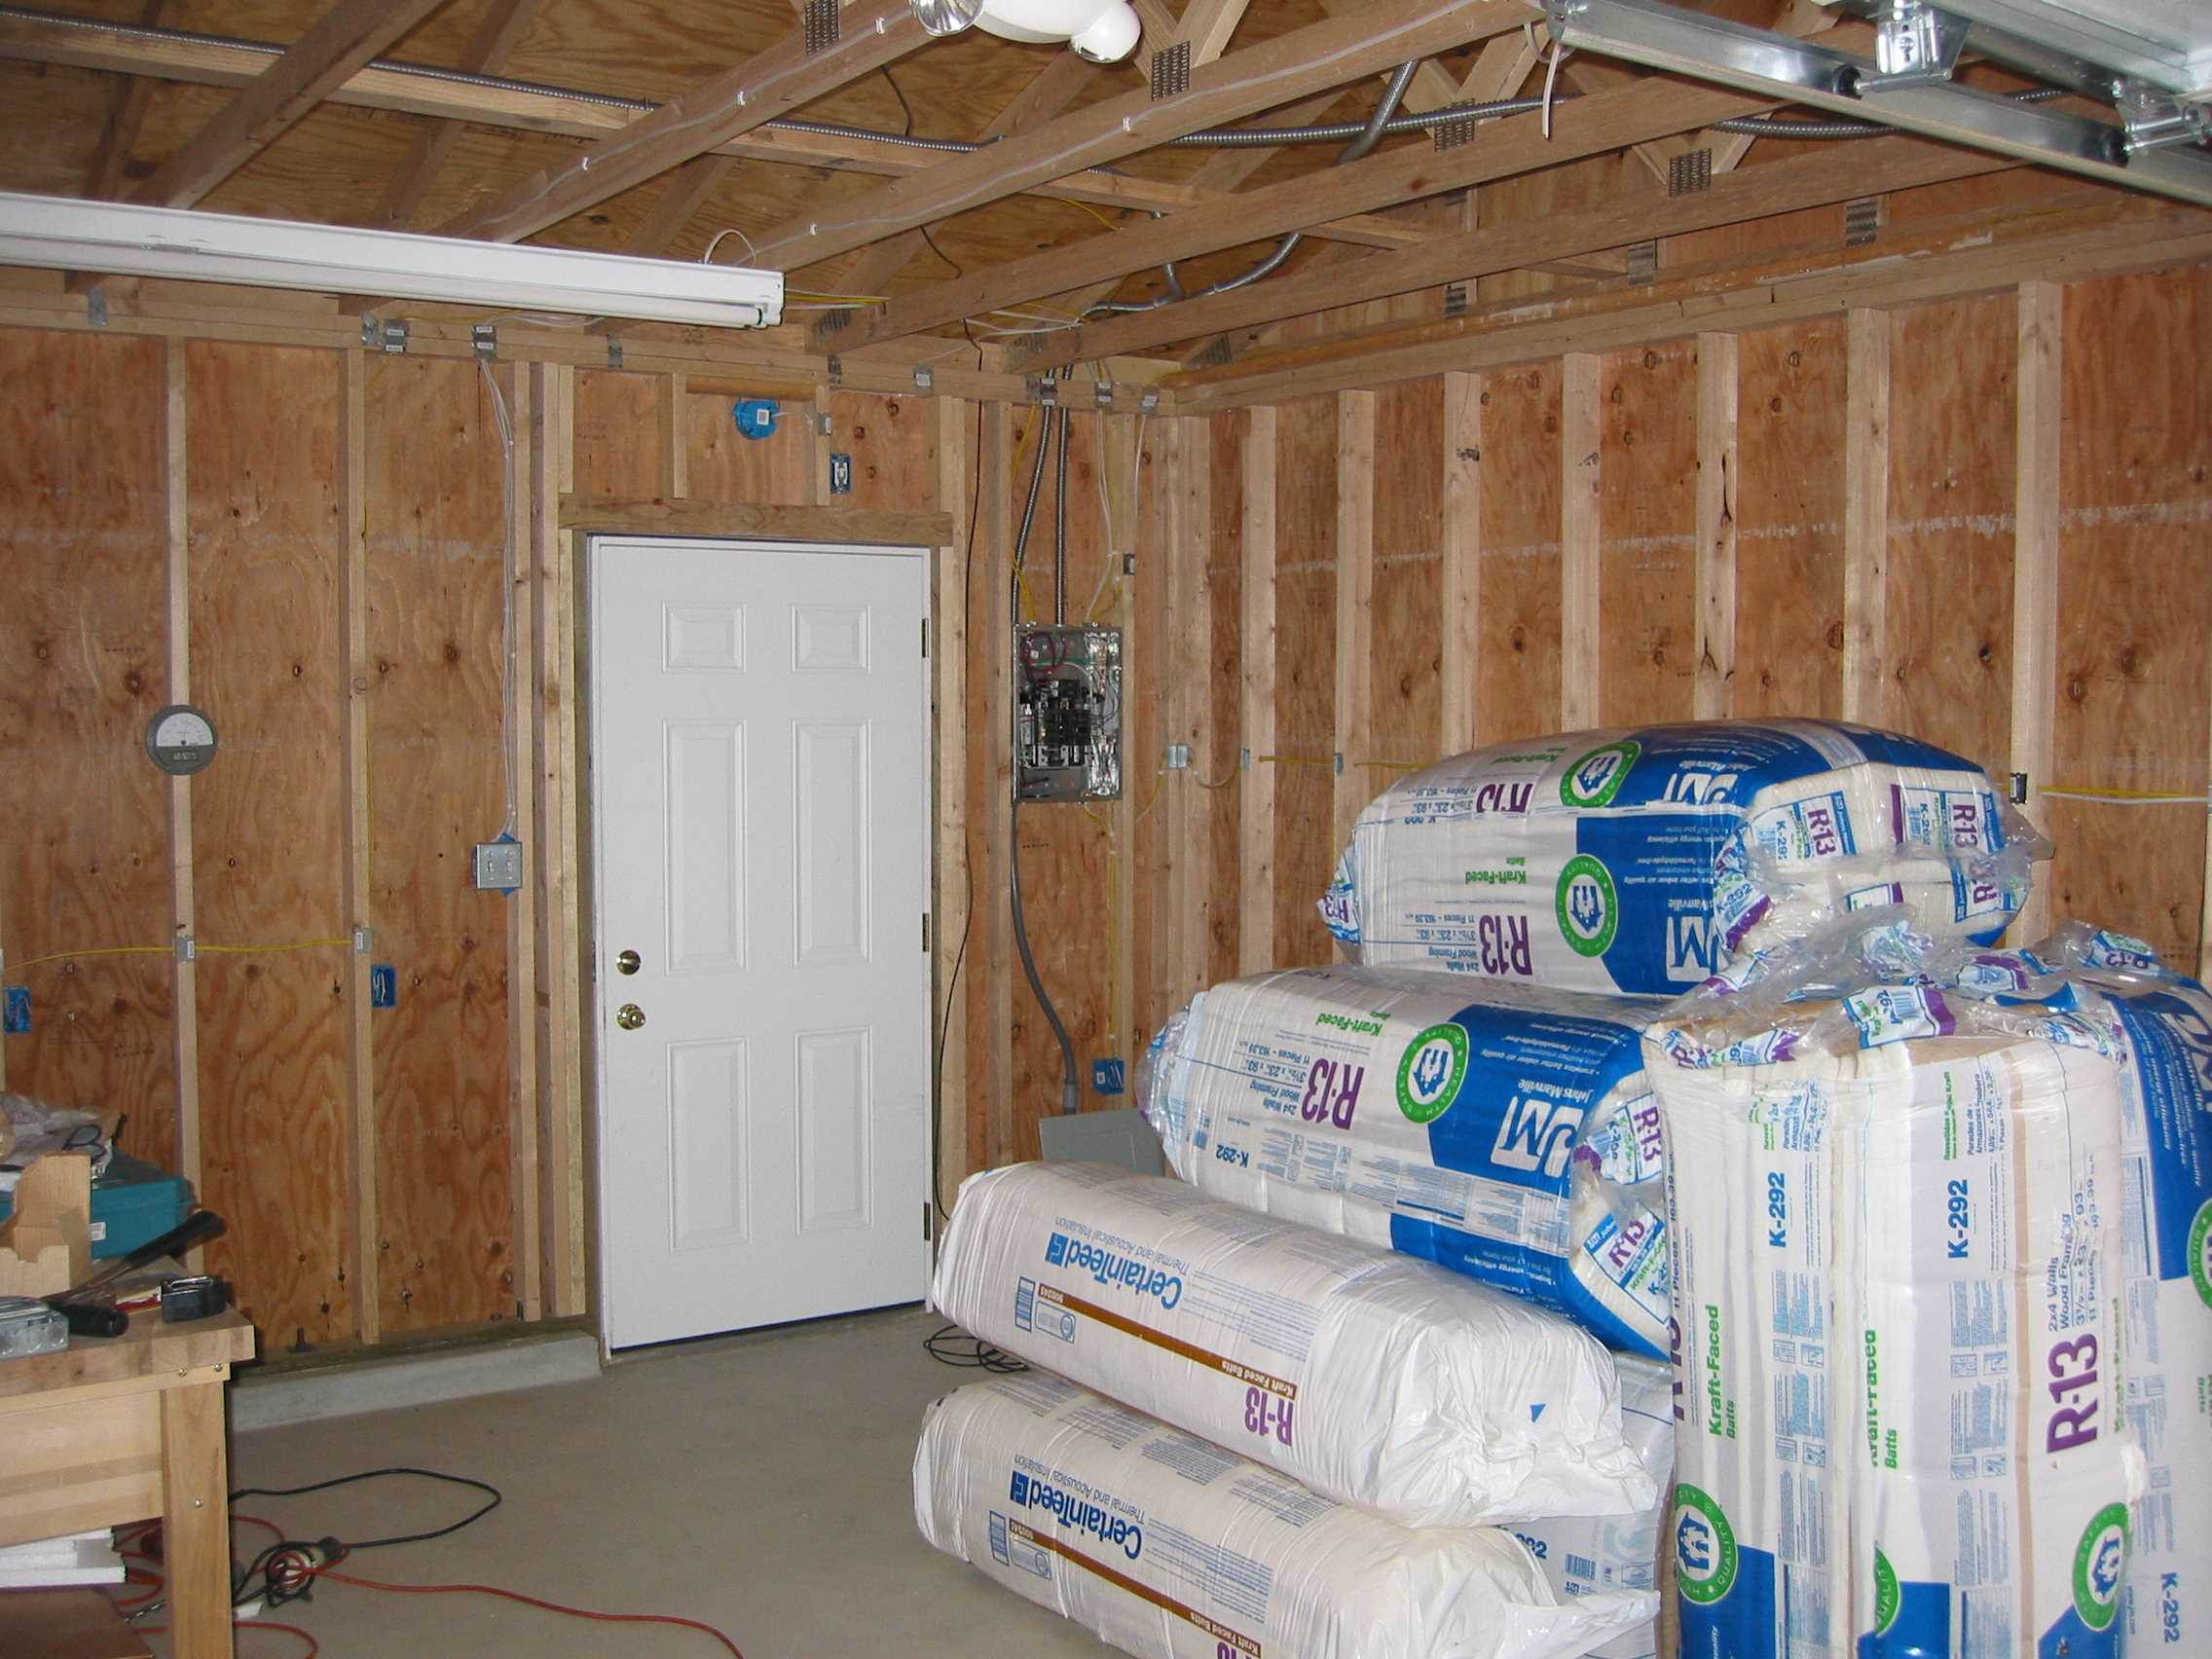
As you can see the insulation is here ... had to order it special for the 24" centers (ceiling and rafters), it's R13 for 2x4's. | |
 |
 |
|
| Installed an emergency light in case power goes out ... it gets very dark ... these will show me the way out ... safely. The 2 blue boxes in the upper corner are power for a TV and a cable outlet. | Lots of insulation for the
rafters, ceiling and walls. The two flex conduit are for the 240 single
phase. Put in junction boxes in case I have to install additional
outlets. As of now I have wiring that will handle two 50 amps circuits
but I use a 40 amp circuit breaker. Plus three 30amp circuits with 20amp
breakers for the lathe, mill and future. Plenty of room for additional
equipment and larger motors! |
|
 |
 |
|
| Finally installed some insulation. When I ordered the 24" wide batts, I had to order 8 bundles ... a lot more then I needed. So I just cut those extras down to fit the 16" centers and I was done. | Now the drywall. Carol and
I actually lifted those very heavy 4'x8'x5/8" sheets. Also notice 3 of
the 4 banks of lights. Two are using the T8 bulbs with an electronic
ballast. The other two are magnetic using T12 bulbs (110 watts each),
but they have a very loud hum, I may change those for the newer T8s. |
|
 |
 |
|
| Drywall done and two coats of mud. The 2'x2' hole in the ceiling is for a little storage area, I placed a few pieces of plywood down before the drywall. | There must be about 10 pounds of screws and 90 pounds of mud and I still have a thin coat to put on. Then I will spray on the texture for an orange peel look, then prime and paint. The table will soon have my 9x20 sitting on it. Getting close! | |
| Closer and closer .... 5/22/06 | ||
 |
 |
|
| Looking at the north wall ... what a difference the texture makes! | The south wall or main entrance. The final thin coat of mud was done earlier this week, then I sprayed on the orange peel look. | |
|
Update 08/29/06 Finally.... progress !! A lot of work has been done ... just not reporting all those changes ... until now. |
||
 |
 |
|
| Finally found my ceiling tile
... the real problem was finding enough boxes that did not have damaged
tile. Before installing I primed and gave the walls two coats of white
paint ... really makes the place look nice. After the tile we put two
coats of epoxy floor covering, that took about 2 weeks for washing,
etching and all the drying etc. But well worth the time and cost. |
Now we are ready to start the move!! First the 300 lb lathe. I use the
tailstock to help balance the lathe. The black steel cross member is to
place the lathe on the hoist legs as we transport it. |
|
 |
 |
|
| This move turned out to be a one
person move ... I was hoping the giant turtle would help pull the hoist,
but he would have nothing to do with the project! |
Ready to be installed on it's
new bench, the plywood under the hoist is to help preserve the epoxy
floor. |
|
 |
 |
|
| Easy ... the hoist makes it so
nice. This and the next pictures provides a good look at the epoxy floor
... nice and smooth, easy to clean! |
Now that the lathe is at home I thought it was time to bring in the surface plate. Doing preliminary leveling. | |
 |
 |
|
| Next .... the 600lb mill/drill.
I had already removed the stand because the boom on the hoist was too
high to get it out of the garage. Plus it was way too top heavy ... even
with the head moved to it's lowest position. |
The route to the workshop is the
same ... so here we are ready for the stand. This move was definitely
not a one man job ... Carol and I had to do a lot of pulling and shoving
to get it across the lawn (even with plywood) ... but we did it by
taking our time and planning ahead. |
|
 |
 |
|
| The move is nearly complete with
only a few things left. This is the North wall showing the single car
garage door as the big entrance for those items that won't fit through
the man door (read new equipment!). |
The East wall. New equipment will be placed to the left of the
mill/drill or anywhere else for that matter. The surface plate is
positioned close to the mill/drill and lathe, being out in the open I
can now use all 4 sides. |
|
 |
 |
|
| Part of the East wall and the
South wall. Notice the sink in the corner. Now I won't have to dirty up
the kitchen! |
Finally the West wall. This old
workbench was built about 35 years ago. It very big and heavy. I plan on
replacing the top surface with new plywood and clean it up |
|
| Well the move is basically done with only a few things here
and there. Such as finish the lathe table by adding a back and drawers.
Clean and fix a few things on the lathe. Add additional lights and wire
them up. Bring plumbed water in so that I can wash my hands. Put a few
things on the wall to personalize the workshop ... etc. etc.
Oh and find new things to add!! This will be the last update on the workshop project. As with most projects it took a lot longer then I thought ... but the end result is well worth the time and effort..... thanks for viewing! Now back to the A3 Switcher!! |
| Update
9/12/07 Well I thought that I would not update this page but guess what .... New Stuff came in ... |
 |
 |
|
| Here they are ... an Acra
10 x 54" Mill with DRO and VFD and Acra Lathe 13x40! |
Tight squeeze ... but it
did fit! |
|
 |
 |
|
| Unloading very simple and easy! | Across the lawn ... 3/4"
ply wood then a thin sheet of steel on top then roller bearings ...
smooth ride!! |
|
 |
 |
|
| This mill weighs in at about 3000#. | Now it's the Lathe turn. |
|
 |
 |
|
| Re-arranged the shop and it
fits just fine. I see the new mill got the Kurt vise already! |
Moved the 9x20 and the new
Lathe took over the old spot. |
|
 |
 |
|
| Front panel showing all the speeds and thread positions ... also has a jog button and flood coolant pump on/off switch. | The VFD controller, the
silver box is the breaking resistor. Unit runs on 240 v and provides 3
phase to the Baldor motor. Run very nice! From about 50 RPMs to 5000
RPMs with just changing from Low to High gear. |
|
 |
 |
|
| The low/high gear is just a
little too close to the edge. I think a small adjustment is in order. |
Notice the two pulley system to the gear box and the 120/127 gear. | |
 |
So far I'm very happy with the new
additions to the shop. I still use the Enco 9x20 a lot so I may keep it.
As for the mill ... so far I haven't used it except for embossing the
rivets for the A3 switcher. But I will probably keep it until I need the
space. It has done a great job and I'm sure I will find many uses. Will see what arrives in the shop next March after Westtec in LA. |
|
| I removed all the oil and
sprayed kerosene to clean out all the little particles then put in new
clean oil. |
||
| Back to TOP | ||
| Projects The Workshop |
| Home | Projects | The Shop | Contacts and Links | Guest Page | Family Stuff |
|---|
| Copyright 2004 thru 2012 Pat Hutcheson |